
YOLOv5

- YOLO 설명
아래는 YOLO에 대한 설명을 적은 글이다. YOLO가 어떤건지 궁금하면 클릭!
https://zeuskwon-ds.tistory.com/90
One-Step Object Detection _ YOLOv5
YOLO YOLO는 You Only Look Once의 약자로 Object Detection One-Step 분야의 대표적인 모델이다. 처음 One-Step 방법을 고안해 속도를 높힘으로써 실시간으로 Object Detection이 가능하게 만들었다. 현재 YOLO, YOLOv3, YO
zeuskwon-ds.tistory.com
Yolov5 깃헙 주소
- https://github.com/ultralytics/yolov5
GitHub - ultralytics/yolov5: YOLOv5 🚀 in PyTorch > ONNX > CoreML > TFLite
YOLOv5 🚀 in PyTorch > ONNX > CoreML > TFLite. Contribute to ultralytics/yolov5 development by creating an account on GitHub.
github.com

위 코드를 가져와서 사용할 예정
Dataset _Traffic Signs Dataset in YOLO format(kaggle)
- Dataset 주소
https://www.kaggle.com/datasets/valentynsichkar/traffic-signs-dataset-in-yolo-format
Traffic Signs Dataset in YOLO format
Annotations of bounding boxes in txt files next to every image
www.kaggle.com

- Dataser Name : Traffic Signs Dataset in YOLO format
- 해상도 : 1360 x 800
- 카테고리 : 4개 progibitory(금지), danger(위험), mandatory(필수), other(그 외)
- Total : 741, Train : 592, Test : 149 (약 250MB)
YOLOv5 Train in Colab
- 드라이브 마운트
# 드라이브 마운트
from google.colab import drive
drive.mount('/content/drive')- 라이브러리 임포트
import torch
from IPython.display import Image
import shutil
import os
from random import choice- YOLO 코드 가져오기
!git clone https://github.com/ultralytics/yolov5%cd yolov5/
!pip install -r requirements.txt- Data Train, Test로 나누기
# arrays to store file names
imgs = []
xmls = []

# setup directory names
train_path = "/content/working/dataset/images/train"
val_path = "/content/working/dataset/images/val"
crs_path = "/content/drive/MyDrive/zeuskwon/ObjectDetection/TrafficSignsDataset/ts/ts_ori"

train_ratio = 0.8
val_ratio = 0.2

# total count of imgs
total_img_count = len(os.listdir(crs_path))/2

# sorting count of imgs
for (dirname,dirs, files) in os.walk(crs_path):
#     print(files)
    for filename in files:
#         print("hello")
        if filename.endswith(".txt"):
            xmls.append(filename)
        else:
            imgs.append(filename)

# counting range for cycles
count_for_train = int(len(imgs)*train_ratio)
count_for_val = int(len(imgs)*val_ratio)
print("training images are : ",count_for_train)
print("validation images are : ",count_for_val)
training images are : 592
validation images are : 148
본인 데이터 주소에 맞게 수정 필요
- 이미지와 라벨 데이터 분리해서 복사
train_image_path = "/content/working/dataset/images/train"
train_label_path = "/content/working/dataset/labels/train"
val_image_path = "/content/working/dataset/images/val"
val_label_path = "/content/working/dataset/labels/val"

if not os.path.isdir(train_image_path):
    os.makedirs(train_image_path)
if not os.path.isdir(train_label_path):
    os.makedirs(train_label_path)
if not os.path.isdir(val_image_path):
    os.makedirs(val_image_path)
if not os.path.isdir(val_label_path):
    os.makedirs(val_label_path)

# cycle for train dir
for x in range(count_for_train):
    file_jpg = choice(imgs)
    file_xml = file_jpg[:-4] + ".txt"

    shutil.copy(os.path.join(crs_path,file_jpg),os.path.join(train_image_path,file_jpg))
    shutil.copy(os.path.join(crs_path,file_xml),os.path.join(train_label_path,file_xml))

    imgs.remove(file_jpg)
    xmls.remove(file_xml)

# cycle for test dir
for x in range(count_for_val):
    file_jpg = choice(imgs)
    file_xml = file_jpg[:-4] + ".txt"

    shutil.copy(os.path.join(crs_path,file_jpg),os.path.join(val_image_path,file_jpg))
    shutil.copy(os.path.join(crs_path,file_xml),os.path.join(val_label_path,file_xml))

    imgs.remove(file_jpg)
    xmls.remove(file_xml)

# rest of files
print("images length - ",len(imgs))
print(imgs,xmls)
for x in imgs:
    file_jpg = x
    file_xml = file_jpg[:-4] + ".txt"

    shutil.copy(os.path.join(crs_path,file_jpg),os.path.join(val_image_path,file_jpg))
    shutil.copy(os.path.join(crs_path,file_xml),os.path.join(val_label_path,file_xml))
# shutil.copytree(crs_path,val_path)
images length - 1
['00557.jpg'] ['00557.txt']
- Yaml 파일 다운로드
!pip install googledrivedownloaderfrom google_drive_downloader import GoogleDriveDownloader as gdd
gdd.download_file_from_google_drive(file_id='1KtlDXpLCfqoklUTdrnVASNbxL_AK9qnx',
dest_path='/content/working/dataset/dataset.yaml')- Yaml 파일 수정
# 모델에 사용될 데이터 경로 확인
import yaml

with open(r'/content/working/dataset/dataset.yaml', 'r') as f:
    data = yaml.safe_load(f)

print(data)
# data = dict()
data['train'] = '/content/working/dataset/images/train'
data['val'] = '/content/working/dataset/images/val'

with open('/content/working/dataset/dataset.yaml', 'w' ) as f:
    yaml.dump(data, f)

print(data)
{'train': '/kaggle/working/dataset/images/train', 'val': '/kaggle/working/dataset/images/val', 'nc': 4, 'names': ['speed limit', 'yield', 'mandatory', 'other']}
{'train': '/content/working/dataset/images/train', 'val': '/content/working/dataset/images/val', 'nc': 4, 'names': ['speed limit', 'yield', 'mandatory', 'other']}
* Yaml파일 가져와서 처음 코드를 실행하면 기존 Yaml에 있는 수정 전 data는 위와 다를 수 있음.
하지만 수정 후는 위와 같아야함
- Yolo 모델 학습
- Image size : 415
- batch size : 16
- epochs : 50
!wandb disabled
!python train.py --img 415 --batch 16 --epochs 50 --data /content/working/dataset/dataset.yaml --weights yolov5s.pt --cache --workers 2
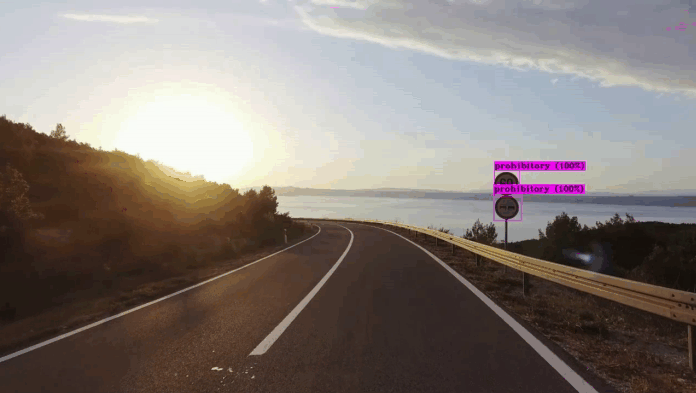
- Predictions on Test data
!python detect.py --source /content/working/dataset/images/val/00427.jpg --weights runs/train/exp/weights/best.ptnum = '00427'
Image(filename=f'/content/working/dataset/images/val/{num}.jpg', width=416)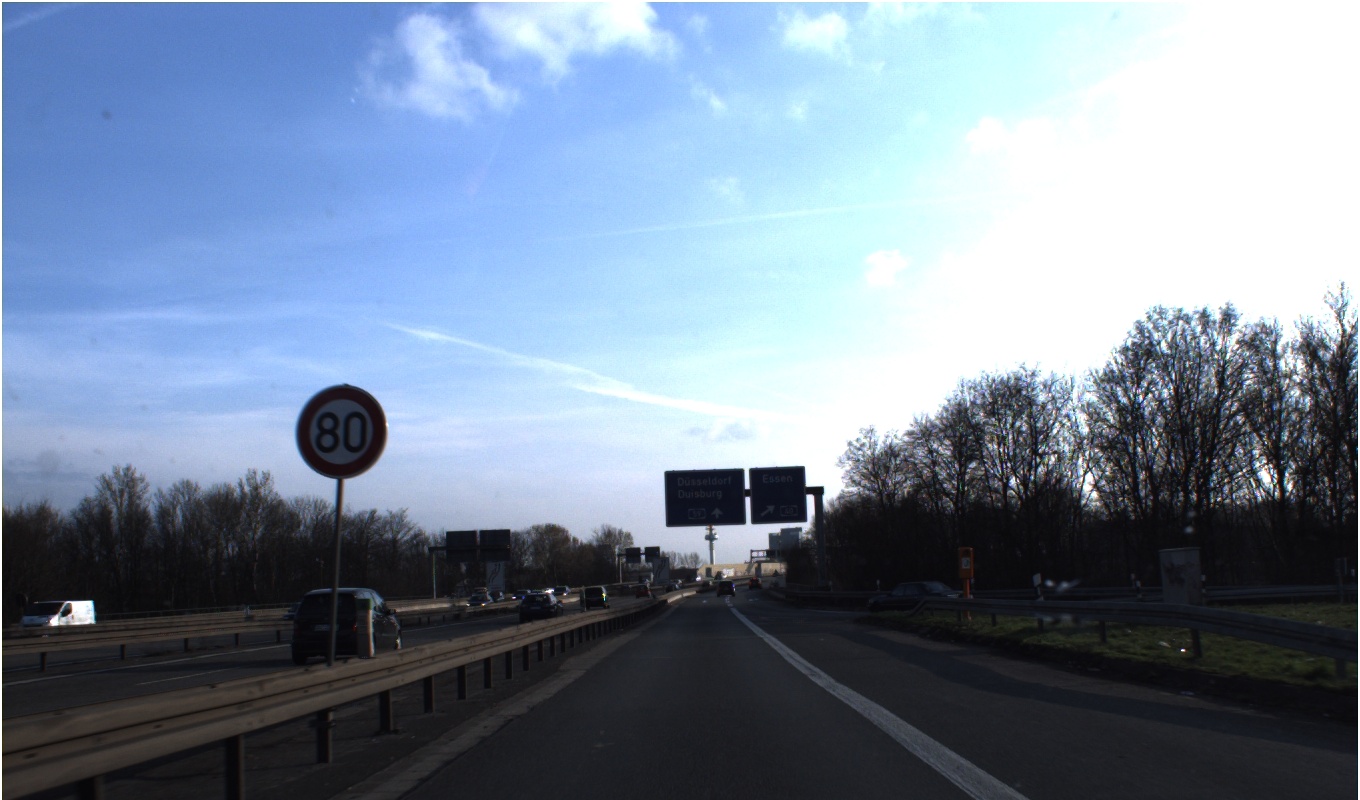
위 이미지가 원본 이미지
Image(filename=f'./runs/detect/exp5/{num}.jpg', width=416)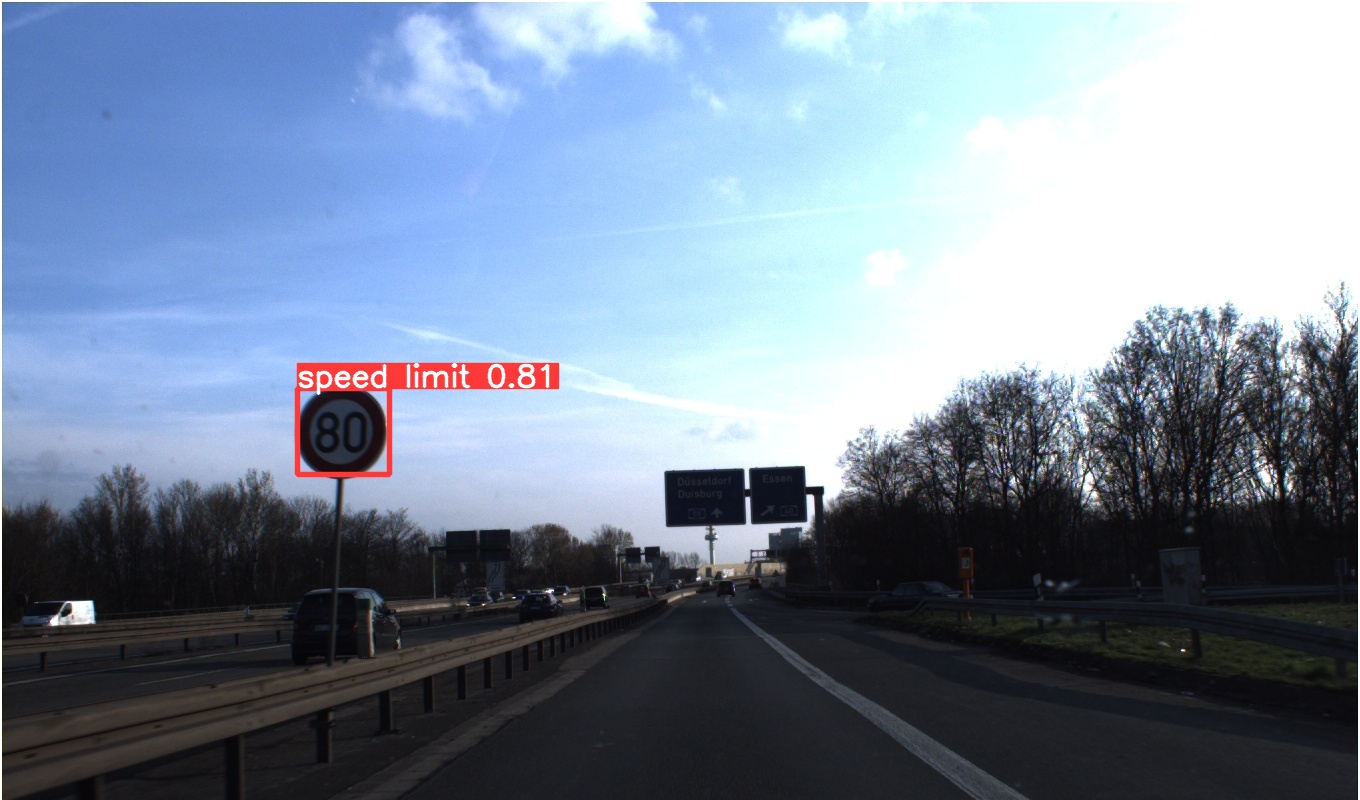
속도 표지판을 0.81확률로 잘 예측함
이것으로 포스팅을 마침
코드 질문은 댓글에 적으면 답장 가능
Reference
- https://www.kaggle.com/code/vimalpillai/traffic-signs-detection-using-yolov5-model
'DataScience > ComputerVision' 카테고리의 다른 글
| One-Step Object Detection _ YOLOv5 (1) | 2023.01.06 |
|---|---|
| ObjectDetection이란? 기술, 알고리즘 연혁 알아보기 (0) | 2023.01.04 |
| DL _ CNN을 활용한 MNIST 손글씨 분류(VGGNet, ResNet) (0) | 2021.11.26 |